- HOME
- THE SOURDOUGH JOURNAL
- SOURDOUGH STARTER
- Building Your First Sourdough Starter
- SOURDOUGH BREAD
- Your First Sourdough Loaf
- Jalapeño Cheddar Sourdough Loaf
- Roasted Garlic & Parmesan Sourdough
- SOURDOUGH SWEET BAKES
- SOURDOUGH DISCARD
- PIZZA & FOCACCIA
- SLOW MORNINGS BREAKFAST & BRUNCH
- HOW TO FEED YOUR SOURDOUGH STARTER
- HOW TO KNOW WHEN YOUR STARTER IS READY
- HOW TO MAINTAIN YOUR STARTER
- HOW TO STORE YOUR SOURDOUGH STARTER
- HOW TO REVIVE YOUR SOURDOUGH STARTER
- COMING SOON

SOURDOUGH STARTER
The beginning of every loaf worth sharing
A living culture made from nothing more than flour, water, time, and a little patience.
Your starter is where the sourdough journey begins. Over the next 7–14 days, flour and water will develop into an active culture ready to bring your first loaf to life.
PREP: 10 minutes
FERMENTATION: 7–14 days Depends on temperature
DIFFICULTY: BEGINNER
YIELD: 1 ACTIVE STARTER
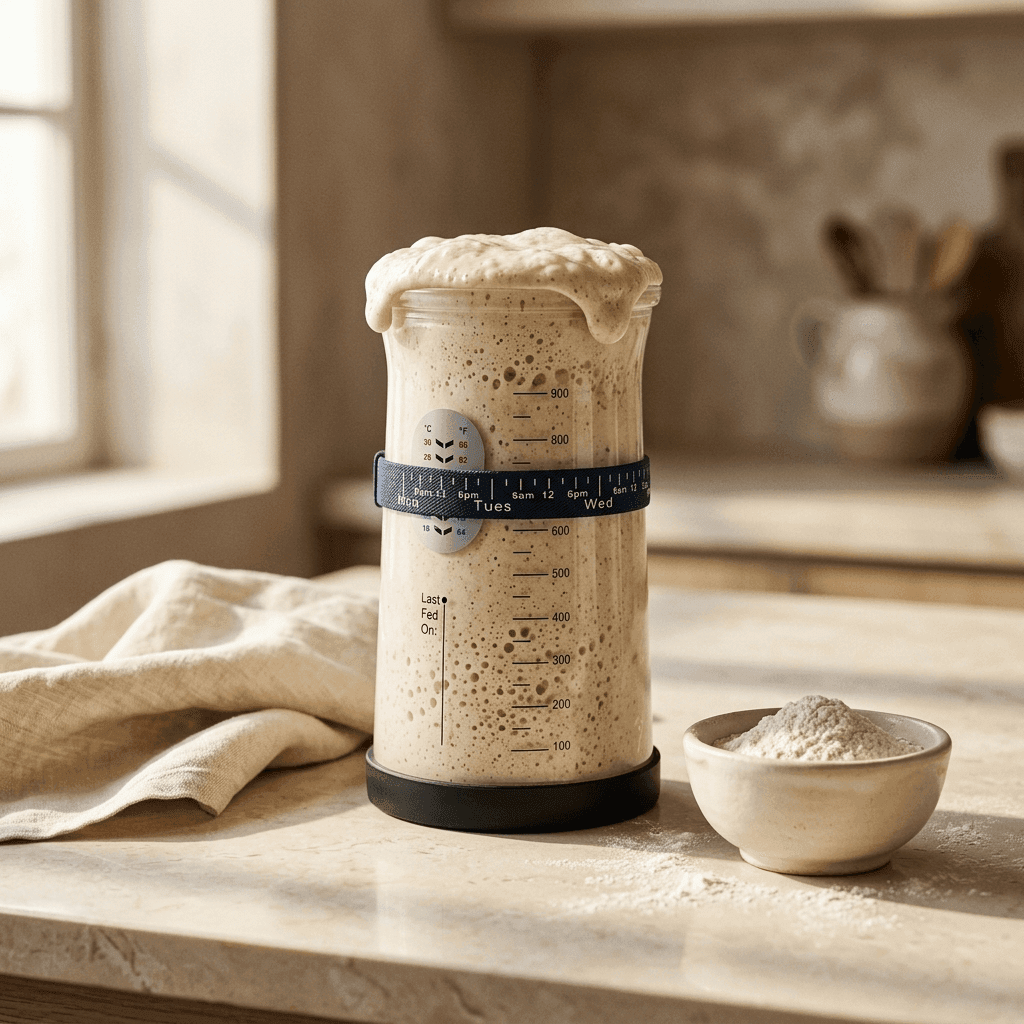
START WITH THE SIMPLE THINGS
You only need a few basic ingredients, simple tools, and a little patience to begin—no digital scale required.
Ingredients
Flour: Use a good-quality flour suitable for fermentation. Whole wheat or rye flour can help encourage activity during the first days.
Water: Use room-temperature filtered or mineral water.
Time: Your starter is a living culture.
Temperature, flour, and environment all affect how quickly it develops, so let the starter show you when it is ready rather than relying only on the clock.
Equipment
SAYMORA Glass Jar: A clear jar makes it easy to observe your starter as it grows and changes.
SAYMORA Spatula: Use it to combine the flour and water thoroughly.
Measuring Cup & Spoon: Simple volume measurements are all you need to feed your starter successfully without needing a scale.
S
SAYMORA NOTE
Your starter does not need perfection.
It needs consistency, observation, and time.
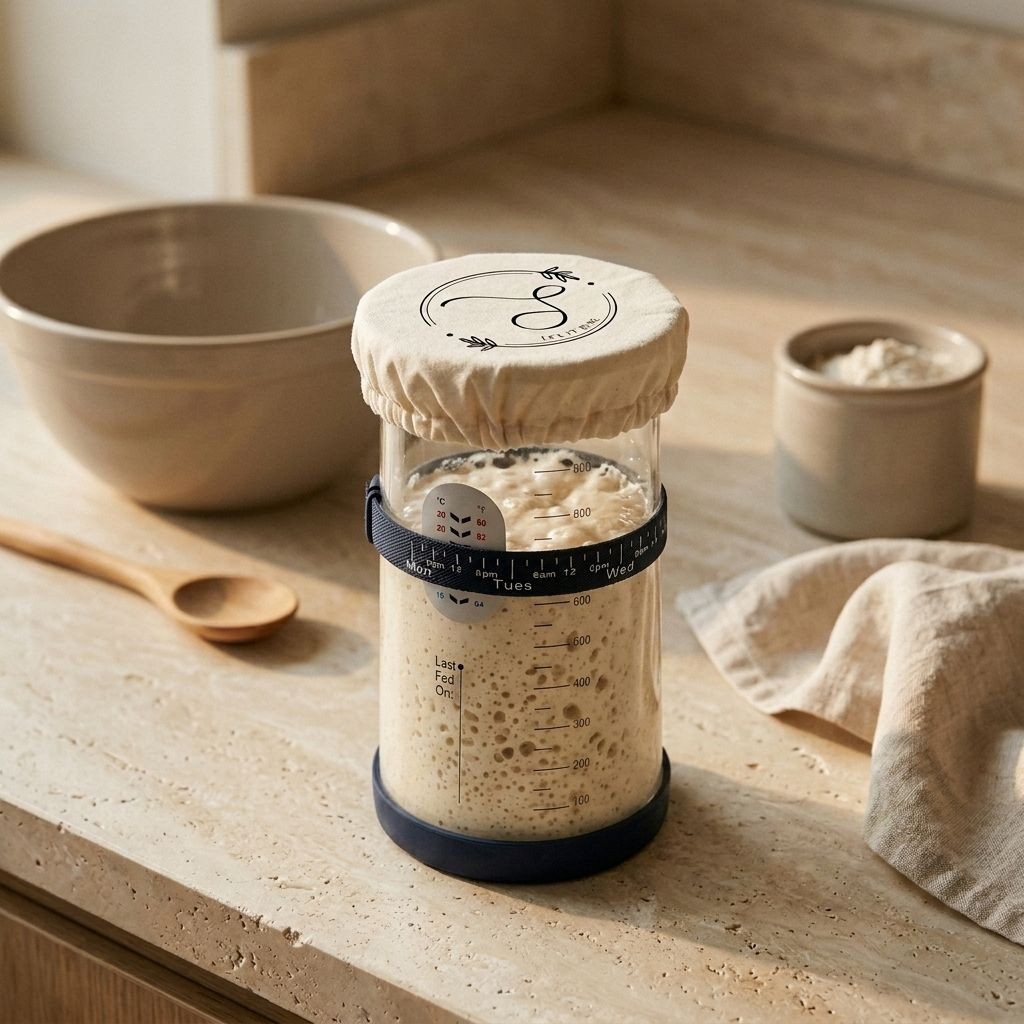
BUILDING YOUR STARTER, ONE DAY AT A TIME
A starter develops gradually. Don't worry if the first few days look different from what you expected. Activity can rise quickly, slow down, disappear and return as the culture establishes itself
DAY ONE — BEGIN THE CULTURE
Step 01 Add 40 g flour and 40 ml water to your SAYMORA jar. Stir thoroughly with your SAYMORA spatula until no dry flour remains and the mixture becomes smooth. Scrape down the sides of the jar to observe the development clearly.
Step 02 Cover the jar loosely with the SAYMORA cloth cover. Place the SAYMORA tracking band around the jar at the level of the starter mixture to mark its starting point so you can easily measure its rise.
Step 03 Leave the jar at room temperature on your counter.
Now comes the hardest ingredient of all: patience ⟡
DAY 02 - WAIT & WATCH
Step 01 Add 40 g flour and 40 ml water to your jar. Stir thoroughly, scrape down the sides, cover loosely with your SAYMORA cloth cover, and adjust your SAYMORA tracking band to the new mixture level.
Step 02 Observe your culture. It may show small bubbles, a slight rise relative to your tracking band, or a pleasant fermented aroma. It may also look identical to Day 1. Both outcomes are completely normal.
Small Bubbles: A sign that fermentation has begun.
A Slight Rise: Your starter is becoming active.
Fresh Aroma: The smell will shift as fermentation matures.
SAYMORA Note: Every starter has its own rhythm. Temperature, flour quality, and environment influence how quickly yours develops
DAY 03 - BEGIN FEEDING
Step 01 Observe your starter for activity relative to your tracking band. Add 40 g flour and 40 ml water directly to the existing culture without discarding.
Step 02 Stir thoroughly with your SAYMORA spatula until fully combined, scrape the jar walls, and cover loosely. Align the SAYMORA tracking band with the top of the freshly mixed starter and let it rest at room temperature.
DAYS 4–7+ - THE DISCARD & FEED RHYTHM
Starting on Day 4, discard a portion of your starter before each feeding to keep the culture balanced and healthy.
The Daily Rhythm:
Discard: Remove half of the mature starter culture from the jar.
Feed: Add 40 g flour and 40 ml filtered water.
Mix: Combine thoroughly with your SAYMORA spatula until smooth.
Track & Wait: Cover loosely, position the SAYMORA tracking band at the top level of the freshly fed starter, and leave at room temperature to monitor activity.
SAYMORA Note: The starter may take 7 to 14 days to become fully mature depending on ambient room temperature. Your starter is ready to bake when it consistently doubles in size within 4–6 hours after feeding, shows a bubbly dome-shaped top, and passes the float test (a spoonful floats in warm water)
LEARN TO NOTICE
YOUR STARTER WILL TELL YOU

BUBBLES
Small to large air pockets appearing throughout the culture show active yeast and fermentation.
RISE
A healthy starter will visibly double in volume above your SAYMORA tracking band within 4–6 hours after feeding.

AROMA
It should smell pleasantly fermented — tangy, fruity or mildly yeasty

TEXTURE
An active, bake-ready starter will look airy and web-like, and a spoonful will float when dropped into warm water.
SO WHEN IS IT READY TO BAKE?
WAIT FOR THE MOMENT. Your starter is ready to bake with when it is consistently active after feeding and shows strong fermentation through visible bubbles and double-in-size rise.
Rather than judging it by age alone, learn to recognize its behavior. A mature starter should reliably double above your SAYMORA tracking band, become aerated, and pass the float test before reaching its peak.
THE SIGNS TO LOOK FOR
Double Rise: Consistently doubles in volume above your SAYMORA tracking band within 4–6 hours after feeding.
Bubbly & Aerated: Displays a dome-shaped top packed with small-to-large active bubbles.
The Float Test: Drop a spoonful of starter into warm water; if it floats on top, it is ready to bake.
FEEDING YOUR STARTER
KEEP THE CULTURE GOING.
Once your starter is established, feeding becomes part of your baking rhythm. Discard half of your culture, then replenish the remaining starter with fresh flour and filtered water. Mix thoroughly, adjust your tracking band, and allow it to ferment again.
A SIMPLE ROUTINE
DISCARD: Remove half of your starter culture before feeding to maintain balance.
ADD FRESH FLOUR AND WATER: Feed your starter with equal parts flour and water (e.g., 40 g / approx. 1/3 cup each).
MIX WELL: Combine thoroughly with your SAYMORA spatula until smooth, and scrape the jar walls clean.
TRACK & FERMENT: Align your SAYMORA tracking band at the new level, cover loosely with the cloth cover, and leave at room temperature.
SAYMORA Note: Your starter will tell you when it needs attention. Learn the pattern of your own culture and maintenance becomes much more intuitive.
THE SIGNS TO LOOK FOR
Double Rise: Consistently doubles in volume above your SAYMORA tracking band within 4–6 hours after feeding.
Bubbly & Aerated: Displays a dome-shaped top packed with small-to-large active bubbles.
The Float Test: Drop a spoonful of starter into warm water; if it floats on top, it is ready to bake.
YOUR FIRST LOAF STARTS HERE.
When your starter is ready, it's time to turn all that patience into something you can share
FAQ
How often do I need to feed my SAYMORA starter?
If kept at room temperature, feed your starter once every 24 hours. Discard half of your existing culture, add equal parts fresh flour and water (40 g / 40 ml each), stir thoroughly with your SAYMORA spatula, and reset your SAYMORA tracking band to monitor its rise.
What should I do with my starter when I’m taking a break from baking?
Store it in the refrigerator! Give your starter a standard feeding, let it sit at room temperature for about 30–60 minutes to show initial activity, cover the jar, and place it on a fridge shelf. Feed it once every 3–5 days to keep it healthy until your next bake.
How do I revive my starter after it has been refrigerated?
Remove the jar from the fridge and allow it to come back to room temperature. Perform a standard discard and feeding with fresh flour and filtered water. Depending on how long it was chilled, it may need 1–2 regular daily feedings before it consistently doubles above the tracking band again.
How do I know when my starter is officially ready to bake with?
Your starter is ready when it is active, lively, and has doubled—or even tripled—in volume within about 4–8 hours after feeding. This is usually the sweet spot for baking: use it when it has reached its peak and is full of bubbles and strength.
A simple way to keep track is to place a SAYMORA band around your jar at the level of your starter just after feeding. As it rises, you’ll be able to see exactly when it has doubled.
If your starter isn’t doubling within 4–8 hours yet, don’t worry. It simply needs a little more time and attention to build its strength. For the next few days, discard most of the starter and feed it with equal parts flour and water by weight. Feeding it twice a day can help bring it back to a strong, active rhythm.
Once your starter is rising predictably, full of bubbles, and doubling within 4–8 hours, it’s ready to become bread.
What is the liquid sitting on top of my starter?
That liquid is called "hooch." It simply means your culture has consumed its food and is hungry. You can either pour the liquid off or stir it right back into the jar before proceeding with your regular discard and feeding.
Why is my starter slow, sluggish, or not bubbling?
Fermentation speed depends heavily on room temperature and flour quality. Move your jar to a slightly warmer spot in your kitchen, ensure you're using fresh, unbleached flour, and continue feeding on a strict daily schedule.
When should I throw away my starter and start over?
If you notice fuzzy mold (black, green, or white), pink or orange streak discoloration, or an unmistakably rotten smell, do not try to save it. Discard the batch, thoroughly wash your SAYMORA jar and tools with warm soapy water, and begin fresh.