- HOME
- THE SOURDOUGH JOURNAL
- SOURDOUGH STARTER
- Building Your First Sourdough Starter
- SOURDOUGH BREAD
- Your First Sourdough Loaf
- Jalapeño Cheddar Sourdough Loaf
- Roasted Garlic & Parmesan Sourdough
- SOURDOUGH SWEET BAKES
- SOURDOUGH DISCARD
- PIZZA & FOCACCIA
- SLOW MORNINGS BREAKFAST & BRUNCH
- HOW TO FEED YOUR SOURDOUGH STARTER
- HOW TO KNOW WHEN YOUR STARTER IS READY
- HOW TO MAINTAIN YOUR STARTER
- HOW TO STORE YOUR SOURDOUGH STARTER
- HOW TO REVIVE YOUR SOURDOUGH STARTER
- COMING SOON

Your First Sourdough Bread
A simple loaf to begin your sourdough journey
There is something special about your first loaf of sourdough.
A jar of flour and water becomes a living starter. A few simple ingredients become a dough. And, with a little patience, you open the oven to find a loaf with a golden crust, a soft crumb, and the unmistakable character of naturally fermented bread.
You don’t need to know everything before you begin.
You simply need an active starter, a little time, and the willingness to let the dough tell you what it needs.
This is a gentle place to start.
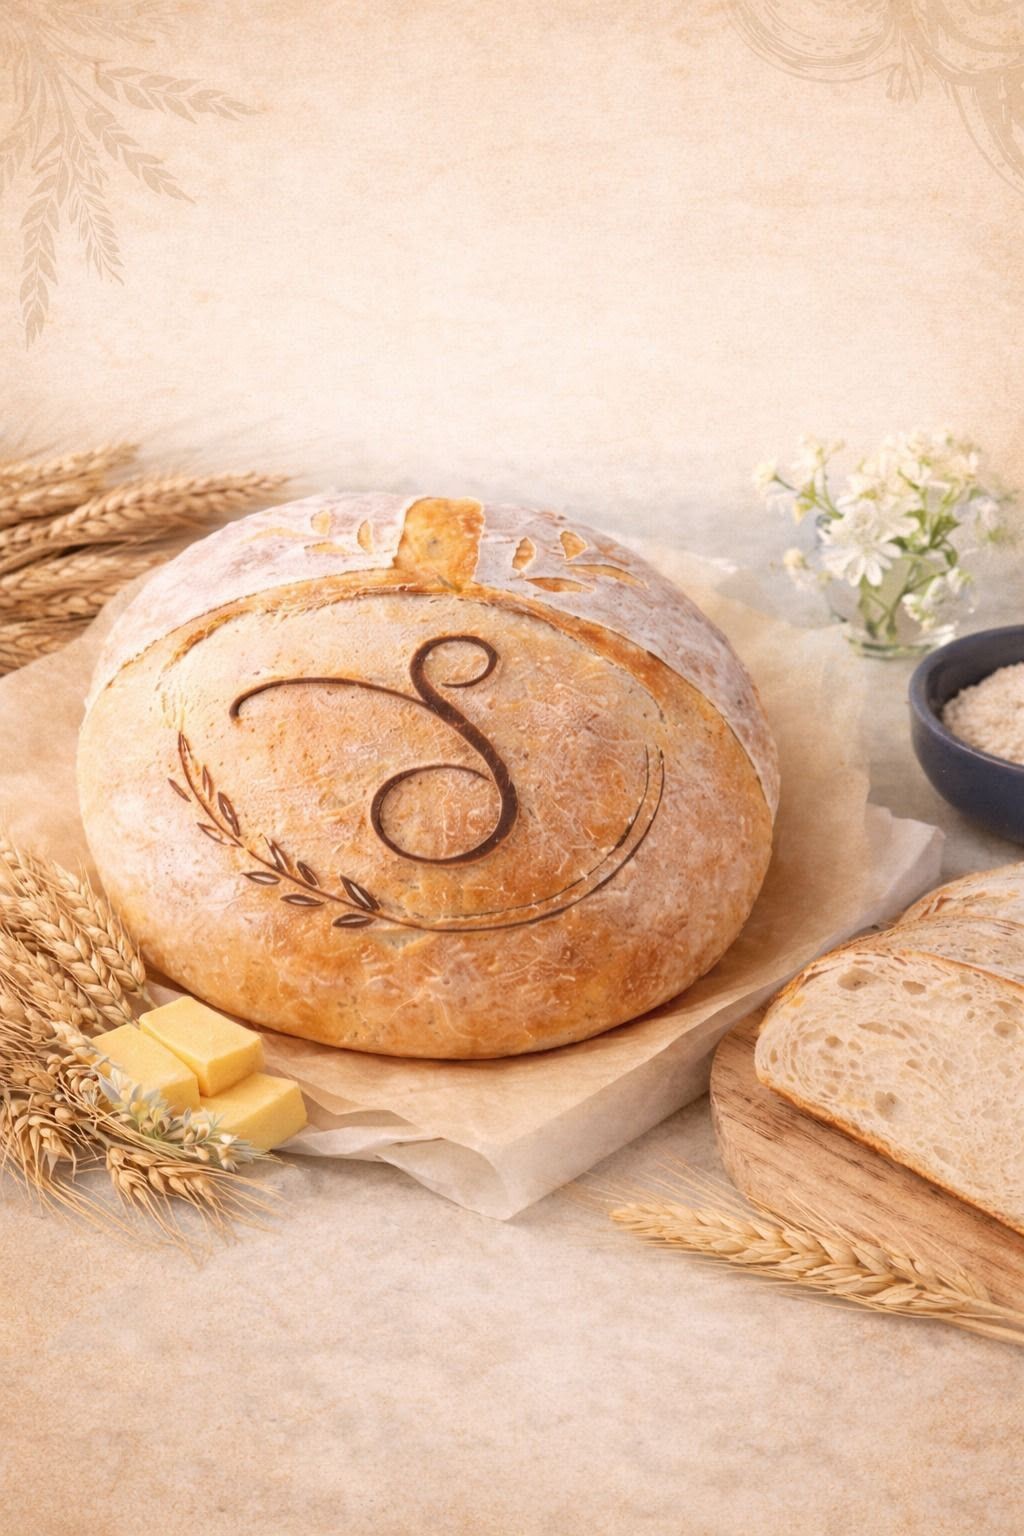
At a Glance
Makes: 1 loaf
Prep: 25–30 minutes active time
Bulk fermentation: approximately 6–10 hours
Cold proof: 12–24 hours
Bake: approximately 45 minutes
Difficulty: Beginner
SAYMORA NOTE
Sourdough does not follow the clock perfectly. Your starter, flour, kitchen temperature, and even the season can change the timing. When in doubt, trust the dough more than the timer.
Before You Begin
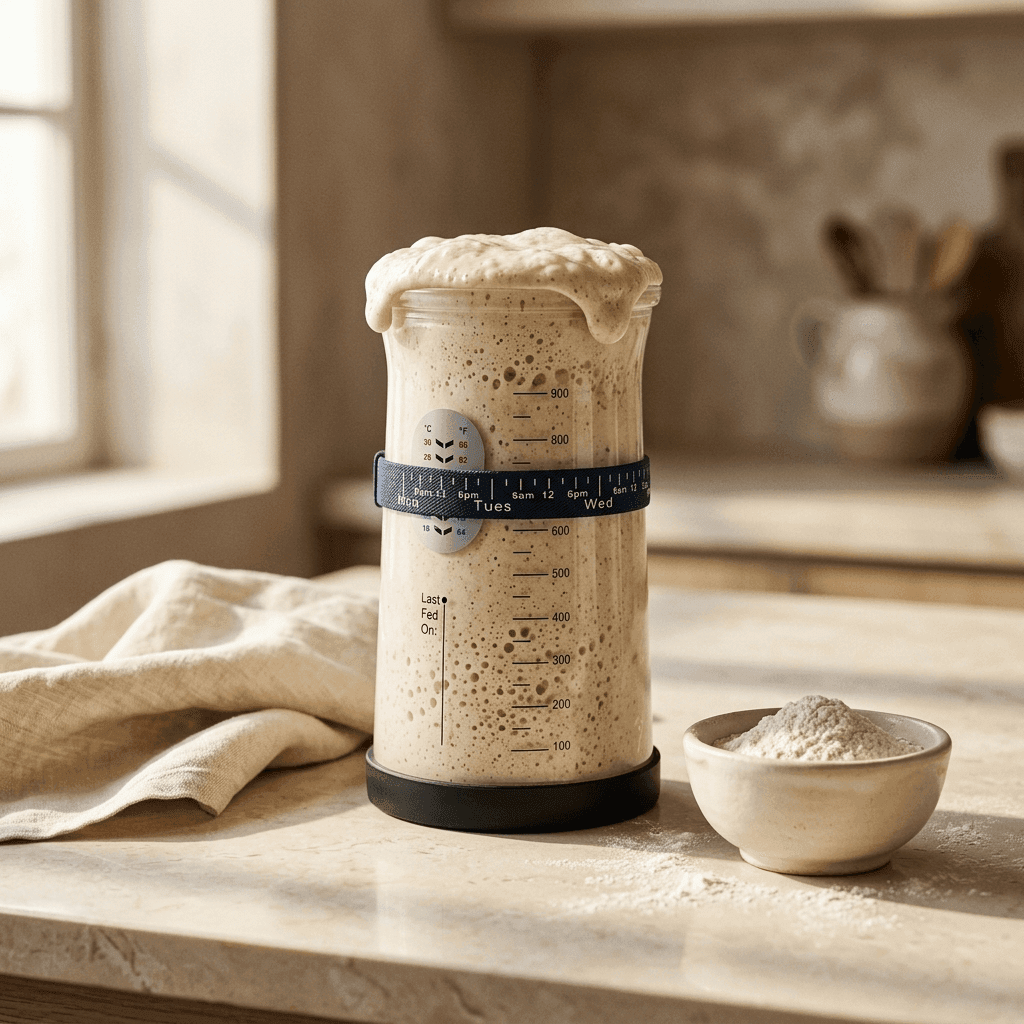
Your starter should be active and ready to bake.
Look for a starter that has doubled—or even tripled—in volume within roughly 4–8 hours of feeding. It should look bubbly and alive, with a pleasant fermented aroma.
If your starter is still sluggish, give it a few more days of regular feedings before beginning your loaf.
A strong starter makes the whole process easier.
INGREDIENTS
100 g active sourdough starter (doubled above your SAYMORA tracking band)
375 g warm filtered water
500 g bread flour (or high-protein unbleached flour)
10–12 g fine sea salt
EQUIPMENT
Large Mixing Bowl
SAYMORA Dough Whisk: Perfect for combining flour, water, and starter seamlessly.
SAYMORA Dough Scraper: Essential for handling sticky dough and shaping your boule cleanly.
SAYMORA Banneton Proofing Basket: Creates the traditional artisan shape and texture as your loaf rests.
SAYMORA Cloth Cover: Keeps the dough protected during its final rise in the basket.
SAYMORA Silicone Bread Sling: Makes transferring your loaf into the hot Dutch oven safe and effortless.
SAYMORA Magnetic Bread Lame: Designed for smooth, precise scoring to allow a beautiful rise in the oven.
Dutch Oven: Heavy oven-safe baking vessel with a lid.

The Journey
Your loaf will move through six simple stages
1. Mix → 2. Strengthen → 3. Ferment → 4. Shape → 5. Proof → 6. Bake
Once you understand this rhythm, sourdough becomes much less mysterious.
01 — Mix the Dough
Add the 100 g active starter and 375 g warm water to a large bowl.
Stir until the starter is mostly dispersed through the water.
Add:
500 g bread flour
10–12 g salt
Mix until there are no obvious patches of dry flour.
The dough will feel sticky and rough at first.
That is exactly where it should be.
Cover the bowl and let the dough rest for 30 minutes.
This quiet pause gives the flour time to hydrate and the dough time to begin developing strength.
02 — Build Strength
Now it is time to give your dough some structure.
With slightly damp hands, reach underneath one side of the dough, gently stretch it upward, then fold it back over itself.
Turn the bowl and repeat around the dough.
That is one set.
Rest the dough for another 30 minutes, then repeat.
Aim for 4 sets over the first 2 hours.
You will notice a difference as you go.
At first, the dough may feel loose and messy. With each set, it should become smoother, stronger, and more elastic.
SAYMORA NOTE
Don’t pull aggressively. Think of stretching the dough rather than tearing it. Gentle hands create better structure.
03 — Let the Dough Rise
After your final set of folds, cover the dough and leave it somewhere comfortably warm.
Now, let the fermentation begin.
This is called bulk fermentation—the first major rise of the dough.
Depending on your starter and kitchen temperature, this can take approximately 6–10 hours.
But don’t wait for a specific number on the clock.
Look for these signs:
The dough has increased by roughly 50–75%
The surface looks smoother
You can see bubbles forming
The dough has a soft, airy appearance
It jiggles slightly when you gently move the container
This is one of the most important moments in sourdough.
Do not wait for the dough to necessarily double.
A dough that has fermented too far can become weak, sticky, and difficult to shape.
When you see the signs above, move on.
04 — Shape Your Loaf
Lightly flour your work surface.
Gently turn the dough out of the bowl.
Avoid pressing the air out of it.
Using your hands or a bench scraper, gently bring the dough together into a round.
Create some tension across the surface without forcing the dough.
Let it rest for 20–30 minutes.
This is your bench rest.
While it rests, prepare your banneton with a light dusting of flour.
Shape it one final time
Bring the edges of the dough toward the center, creating a tighter, more structured round.
Turn it over and gently pull the dough toward you across the work surface to create surface tension.
The finished dough should feel cohesive and hold its shape.
Place it seam-side up into your prepared banneton.
05 — The Slow Proof
Cover your banneton so the dough does not dry out.
Place it in the refrigerator.
For your first loaf, we recommend a 12–24 hour cold proof.
This slower stage gives the dough time to develop flavor while becoming easier to handle and score.
And there is another beautiful advantage:
The refrigerator gives you flexibility.
You don't have to bake your bread in the middle of the night.
Let the dough rest in the cold while you sleep, then bake when you're ready.
06 — Score & Bake
When you are ready to bake, place your Dutch oven inside the oven and preheat to 250°C / 480°F.
Give the oven plenty of time to become fully heated.
When the oven is ready, take your dough directly from the refrigerator.
Place a sheet of parchment over the banneton and carefully turn the dough onto it.
Lift away the basket.
Now comes the moment to make your mark.
Score the loaf
Using your SAYMORA bread lame, make one confident cut across the surface of the dough.
A slightly angled score allows the loaf to open beautifully in the oven.
Keep it simple for your first loaf.
The bread will do the rest.
Into the Oven
Carefully transfer the dough into your preheated Dutch oven.
Cover with the lid.
Bake:
25–30 minutes covered
Then remove the lid and reduce the oven temperature to:
220°C / 425°F
Continue baking for approximately 15–20 minutes, or until the crust is deeply golden brown.
You are looking for a rich, well-developed crust—not pale, and not burned.
The Hardest Part: Wait
Remove your loaf from the Dutch oven and place it on a cooling rack.
Now, leave it alone.
Let it cool for at least 1 hour before slicing.
We know.
It is difficult.
But the inside of the bread is still setting as it cools. Cutting too early can leave you with a gummy crumb, even when the loaf looks perfectly baked.
Let the bread finish its transformation.
Then slice.
Listen for that crust.
Your First Loaf
Your first sourdough loaf may not look exactly like the one you imagined.
That is part of learning.
Maybe the score opened beautifully. Maybe the crumb is tighter than you hoped. Maybe your loaf spread a little more than expected.
None of that means you failed.
Sourdough teaches you to notice.
The next loaf will tell you something the first one didn't.
And slowly, you begin to understand your starter, your flour, your kitchen, and your own rhythm.
That is the art of sourdough.
One Last Thing
Don't try to perfect your first loaf.

Bake it. Observe it. Learn from it. Then bake another.

Every loaf is part of the process.

And before long, what once felt complicated becomes wonderfully familiar:

Feed. Mix. Fold. Wait. Shape. Proof. Bake.

Let it rise.
SAYMORA Sourdough FAQ
My dough is extremely sticky. What happened?
SAYMORA offers a range of premium kitchenware and home essentials, including cookware, cutlery, and stylish home accessories.
Some stickiness is completely normal, especially with a higher-hydration dough.
But if the dough is extremely slack, impossible to shape, and loses all structure, it may have fermented too far.
Next time, watch the dough rather than waiting for it to double.
My dough barely rose. Why?
The most common place to look is your starter.
If your starter was not strong and active when you mixed the dough, fermentation may take much longer.
Temperature also matters. A cool kitchen can slow fermentation considerably.
My loaf spread instead of rising upward.
This can happen when the dough has been over-fermented or does not have enough strength.
Pay close attention to your stretch-and-folds and stop bulk fermentation when the dough has increased by roughly 50–75% and feels airy and elastic.
My bread has a gummy center.
First, make sure the loaf was fully baked.
Second, resist the temptation to slice it while warm.
A sourdough loaf needs time to cool and finish setting internally.
My crust is too pale.
Give it more time uncovered.
The final uncovered stage is where the crust develops its deeper color and character.
How long does sourdough bread take to make?
The actual hands-on work is surprisingly short.
The dough, however, needs time.
Plan for approximately 6–10 hours for bulk fermentation, followed by 12–24 hours in the refrigerator for the cold proof.
The exact timing will depend on your starter and kitchen temperature.
Can I make sourdough bread in one day?
Yes.
You can shorten the cold proof, but a longer cold fermentation generally gives you more flexibility and allows the dough more time to develop flavor.
For your first loaf, we recommend keeping the overnight proof.
Do I need to let the dough double during bulk fermentation?
Not necessarily.
For this style of sourdough, look for approximately a 50–75% increase in volume, along with bubbles, a smoother surface, and a gentle jiggle.
Waiting for the dough to double can sometimes take fermentation too far.
Can I use all-purpose flour instead of bread flour?
Yes, although the dough may behave differently.
Bread flour generally provides stronger gluten development, which can make a higher-hydration dough easier to handle and shape.
If using another flour, pay attention to the dough rather than following the water quantity blindly.
What temperature should my water be?
Use comfortably warm water—not hot.
Very hot water can damage the living microorganisms in your starter.
If your kitchen is warm, room-temperature water may be enough.
How do I know when bulk fermentation is finished?
Look for the dough to become visibly fuller and more aerated.
You should see some bubbles, the dough should jiggle when moved, and its volume should have increased by roughly 50–75%.
These signs are more reliable than a fixed number of hours.
Why did my sourdough not rise in the oven?
A weak starter, underdeveloped dough strength, or over-fermentation can all reduce oven spring.
Your starter should be active before mixing, and your dough should still have strength and elasticity when you shape it.
Can I leave my shaped dough in the refrigerator overnight?
Absolutely.
That is one of the simplest ways to make sourdough fit into your day.
Shape the loaf, place it in your banneton, cover it well, and refrigerate until you're ready to bake.
Do I need to bring the dough back to room temperature before baking?
No.
For this method, the dough can go directly from the refrigerator to scoring and then into the preheated Dutch oven.
In fact, cold dough is often easier to score and handle.
How long should sourdough cool before slicing?
At least 1 hour.
For a larger loaf, allowing it to cool even longer can give the crumb more time to set.
As tempting as that first slice is, patience here really does make a difference.
How should I store my sourdough bread?
Once completely cool, keep the loaf cut-side down on a bread board for short-term storage, or store it in a breathable bread bag.
Avoid sealing a warm loaf in an airtight container—the trapped moisture can soften the crust.
Can I freeze sourdough bread?
Yes.
For the best texture, slice the cooled loaf before freezing. That way, you can take out only what you need.
Wrap it well and freeze it for longer-term storage.